
If you are a person or person from a small company who works with cheques. Then, this windows based application will help you to print your cheques clearly with adjustable field sets using your own printer. Additionally, you will be able to maintain customer names that you are using very often. It will also provide history of printed cheques.
Help – Private Cheque Printer
How to install?
First, visit https://ideajay.com/downloads/#Cheque and download the Private Cheque Printer, double click the setup file and click next
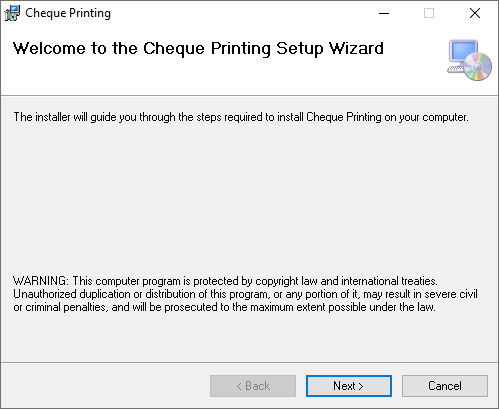
In next window, please select the folder that installation needs to do.

Finally, click next and finish the installation.
Note
After the successful installation, please grant full permission to the installed folder. (C:\Program Files\IdeaJay\Cheque Printing)
To grant permission, visit the installed folder and follow the steps below.
- Right click on the folder and select Properties
- Select the Security tab in property window
- Click Edit button
- Select relevant user and give the full control
- Click Apply button
How to work with it?
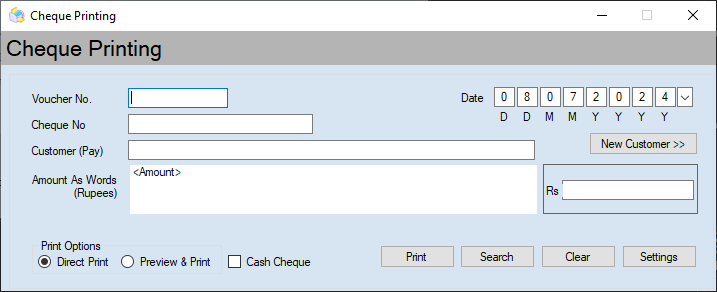
After successful installation, it will be creating a desktop icon and start menu item. Just double click it and the user will able to view the following form. After that, user can fill in the relevant information and click the Print button.
| Property / Field | Description |
| Voucher No | This number for the helping purpose |
| Cheque No | Cheque number that going to be print |
| Customer | Name of the person that address the cheque |
| Amount | Amount of the cheque. When you enter the amount, this will be converted it as word automatically |
| Print option | |
| Direct print | When the user clicks the Print button with this option, it will go to the printer without previewing it. |
| Preview and Print | When the user clicks the Print button with this option, it will preview the cheque before go to the printer. |
| Cash Cheque | Please click this box if it is a Cash Check. It will provide additional area to put the signature. |
| Date | Date of the issue |
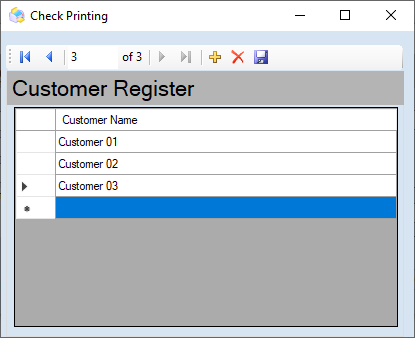
Users can save the customer or persons who issue the cheques very often, by clicking the New Customer button. Then, the following screen will appear to manage the names of the payees.
| Button | Description |
| Add | This number for the helping purpose |
| Delete | Cheque number that going to be print |
| Save | Name of the person that address the cheque |
| If the user wants to edit any name, please double click edit and click Save button. |
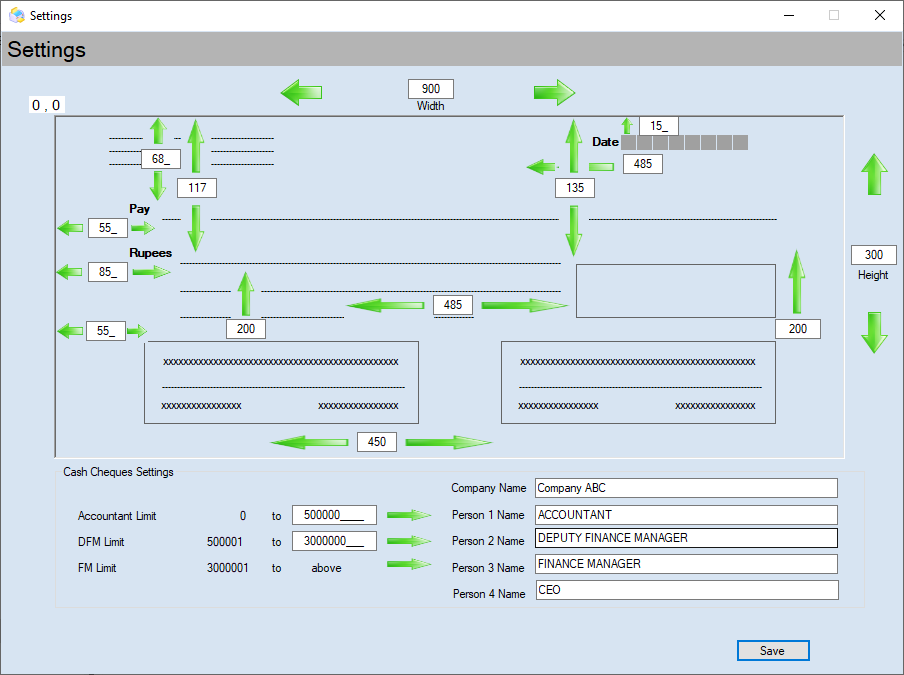
Using the Setting form (Click Settings button), the user will able to adjust the text alignment against the real cheque. Finally, user needs to click the Save button.
Leave a Reply